Any links on this page that lead to products on Amazon are affiliate links and I earn a commission if you make a purchase. Thanks in advance for your support!
How To Set Up Your Pedal Board – Pro Tips And Tricks For Guitarists
Learning how to set up your pedal board the right way can be both fun and practical!
This guide will walk you through setting up your pedalboard in a logical and organized manner. You’ll also learn some tips and tricks to getting the most out of your effects, find the right pedal order, and how to avoid the most common problems.
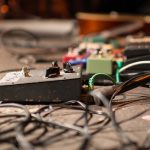
Of the many products for guitars available, pedalboards are at the top of the list for best “bang for the buck” guitar gear. And learning how to set up your pedal board properly is time well spent.
They may not be all that sexy, but a well-organized pedalboard is a must for guitarists for both stage and studio use. It ends up saving guitarists both time and money in the long haul, which more than justifies their cost.
But, many guitarists buy effects pedals and pedalboards and hook everything up without considering how to get the best results. This article will walk you through everything you need to know to set up a pedalboard that sounds great while avoiding issues with noise or poor sound quality.
And I’ll throw in some popular effects chains used by countless pro guitarists!
Let’s dive into the details!
Check out my complete series of pedal board articles:
How To Set Up Your Pedalboard
The goal of your pedalboard is to:
- Have a logical layout that lets you focus on your music and not on your pedals
- Create the right pedal order that reduces noise and hum
- Embellish tone and add character, not destroy it
Logical Layout
Most guitarists have their effects laid out and connected from right to left. The reason is that many standard size pedals have the input on the right side and output on the left. The right to left connections flow from pedal to pedal naturally.
BUT, you don’t have to set it up this way if it doesn’t feel right. Experiment with it until you find the flow that suits you!
Pedalboard Order Basics
An effective layout is based on optimizing your guitar’s signal running through various effects, as well as including your own creative workflow and sound choices.
The most important thing to know is:
The order of your pedals makes a huge difference in your sound!
Some pedals work better earlier in the chain, others better at the end. Getting this right solves many of the issues that can come up.
Pedal Order Pro Tip
Though choosing the order of pedals in your pedalboard is part art and part science, there are some time-tested chain layouts that prevent issues with incorrect pedal placement. You’ll find some popular sample chains later in this article.
That said, sometimes unique and creative sounds come from breaking the rules.
So, if you’re new to pedalboards, try a time-tested layout first, and feel free to experiment afterward!
Tips and Guidelines On Pedal Order Placement
The following tips and guidelines will help you understand the best order to put your effects pedals in a chain. The object is to produce great tone with minimal noise buildup.
- If you use a tuner, it should be the first pedal in the chain so you can tune your guitar signal without any effects. You can’t effectively tune a guitar with delays or modulation effects turned on. Your guitar should be plugged directly into the tuner.
- Pedals that help create your guitar’s basic tone – like overdrive, distortion, wah, EQ – should come before pedals that modify or change the sound, like chorus or phasers.
- Distortion/ overdrive units, wah pedals, and any other gain increasing effects can potentially increase noise and/or amplify noise created by previous devices in the chain. They should fall towards the beginning of the chain but before any delay/reverb devices.
- Time-based effects like delay or reverb that create ambiance should be at the end of the chain. Logically this makes sense as reverb and delay effects are produced naturally from sounds and are the last things you hear.
- Looper pedals should go at the very end, so the complete signal chain gets looped.
- A volume pedal can go either at the beginning or end of the chain, with a different effect created with each location. Experiment!
Guitar Tuner: In The Chain or Not?
Some purists don’t like having a tuner in the chain, as they feel it adversely affects their tone.
But others love the ease of use that a tuner pedal brings.
There is no right or wrong answer here; it’s up to your own personal preference. I find that having a tuner in my pedalboard is easier than having to connect to a separate one when I need to tune up.
If you are concerned about loss of tone, there are tuner pedals available that have a true bypass mode. This mode bypasses all the pedal’s circuitry and sends the input signal directly to the output jack without any loss of tone.
Also, some volume pedals have a tuner out jack that bypass circuitry. Check those out as an alternative.
Good Pedalboard Order Diagram
The following diagram illustrates a time-tested effects chain that follows a logical arrangement of effects. It’s designed to maximize tone and minimize noise.
Guitar -> Tuner -> Volume Pedal -> Dynamics -> Gain -> Modulation -> Time-Based -> Looper -> Amp

EFFECTS GUIDE
Dynamic Effects = Wah/ Compressor/ EQ
Gain Effects = Overdrive/ Distortion/ Fuzzbox
Modulation Effects = Chorus/ Flanger/ Tremolo
Time-Based Effects = Delay/ Reverb
Sample Pedalboard Order Chains
Here is a very popular pedalboard chain that provides lots of different sound options:
Guitar -> Tuner -> Volume Pedal -> Wah Pedal -> Overdrive -> Chorus -> Tremolo -> Delay -> Amp
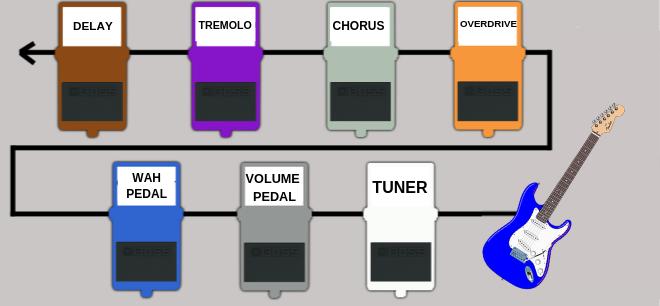
The wah pedal can also be placed after the Overdrive for a different sound.
Another very effective effects order chain:
Guitar -> Tuner -> Compressor -> Distortion -> Pitch Shifter > Delay -> Looper -> Amp

Many guitarists use compressors on clean tones to “fatten” the sound.
It’s common to disable the compressor when using distortion or overdrive as these sounds are by nature somewhat compressed.
Using compression and distortion together also can result in a lot of noise or hiss. But then again, lots of players swear by the increased sustain when using both. See what works for you!
Pedal order chain with EQ:
Guitar -> Tuner -> Volume Pedal -> Overdrive -> Distortion -> EQ -> Chorus -> Delay -> Amp
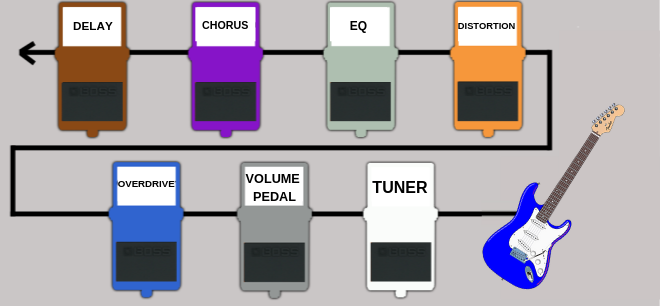
EQ is added in this chain as a way to alter the guitar’s tone and volume, especially when used on solos to cut through better.
Troubleshooting: Dealing With Noise Or Poor Sound Quality
If you end up with issues with noise, hum, hiss, or an overall dull sound, the following sections can help you fix the problems.
First, try this test: Plug your guitar straight into your amp, and then compare that sound with plugging into your pedalboard with all the pedals off. If the sound is noticeably different, then the following solutions should help.
Dull Or Muffled Sound
Dull or muffled sound can be the result when many effects units and cables are connected together. Each effects unit and cable introduces capacitance, and this builds up as the signal travels through multiple units. Too much capacitance results in a poor overall guitar sound that’s muddy, dark or muffled sounding.
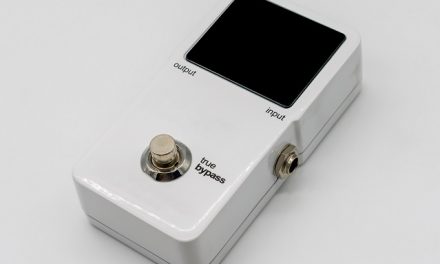
True Bypass
Bypassing units using true bypass jacks is one solution to the problem. True bypass simply means that the effect pedal can be switched to bypass all circuitry.
Less circuitry = less capacitance.
If your effects offer true bypass, be sure to use them in that mode. Some pedals even provide true bypass mode when they are either off or on (fantastic!), but many older models do not.
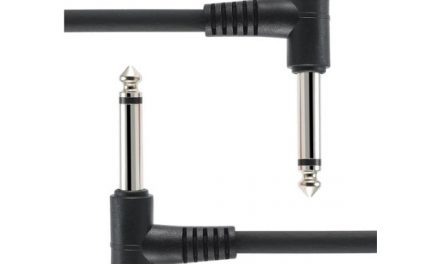
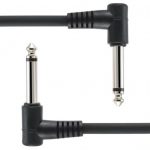
Cables
Cables are an overlooked part of guitar playing. They are like an afterthought; many players just use the cheapest ones they can get. But cheap cables – especially the coiled types – can significantly increase capacitance and detract from your overall guitar tone.
So, the solution is to always use high-quality cables. And make sure your connecting cables between effects pedals are as short as possible. You should hear an increase in sound quality as well as reduced noise.
Buffer Pedals
Buffer pedals are devices that can reduce the capacitance in the chain of effects, thus improving overall tone and sound.
The good news is that some manufacturer’s effect pedals are designed with and incorporate buffer circuitry. The buffer may even be active when the pedal is bypassed, which is double good news.
Some tuners include a buffer, and some active guitar pickups (those powered by a battery) may include buffered circuitry.
Check the specs on your pedals to see if a buffer is included. You can also purchase a specialized buffer pedal if needed.
Pro Tip
Buffer Pedal Placement
There are a few places you can try adding a standalone buffer pedal:
- In front of a long cable from your guitar to the pedalboard
- In front of low impedance effect like a fuzzbox
- At the end of the chain, from the pedalboard to your amp. As the last pedal in the chain is what feeds your amp, a standalone buffer pedal sometimes works best here.
Experiment with these different placements to see what improves your sound the most.
Noise
Too much noise or hiss can be fixed by reducing the capacitance, replacing low-quality cables with high-quality ones, and keeping your cables as short as possible.
If noise and hiss are still an issue, noise gate units are available to gate the signal when it drops below a certain threshold.
Advanced Pedal Use: Using Your Amp’s Effects Loop
Another lesser known but very cool way to use your pedals is by incorporating them into your amplifier’s effects loop.
What is an effects loop? An effects loop is simply circuitry in your amp that allows you to send and return signals before the power amp section but after your amp’s preamp. Some amps label the loop as Effects Send /Effects Return, or Power Amp In (Effects Return) / Preamp Out (Effects Send).
The effects loop is most commonly used by guitarists who are using their amp itself to provide overdrive and distortion, not through their effect pedals. You usually cannot beat an overdriven tube amp for great tone, and using the effects loop on one of these amps really sounds great!
Not all amps, however, have effects loop circuitry, but if yours does, it can add additional flexibility to your guitar’s sound.
Using Effects In An Effects Loop
The effects loop is normally only used with delay and/or reverb effects that provide ambiance. It is not recommended for other types of effects.
What’s the difference in sound between using the effects loop and just using the effects as usual?
If you use your amp’s gain circuitry to provide distortion/overdrive, running your delay through the loop gives you a brighter crisper sound – you can hear the delays in much greater detail and clarity. Without using an amp’s effects loop, running a distorted signal directly into a delay more often than not results in a much muddier tone.
Series and Parallel Effects Loops
Depending on your amp, you may come across series and parallel effects loop circuitry. The difference between them is how the signal is processed.
With a series effects loop, the signal from the amp’s preamp passes straight from the effects send output to the effects pedal input and out from the pedal’s output back into the effects return input.
However, parallel effects loop circuitry splits the effects and non-effects signal. Half of it goes from the preamp to the effects pedal and back into the amp. The other half goes straight to the amp’s power amp section that has no effects.
A Mix control that lets you control the amount of effect you hear.
Pro Tip
Make sure you set the Mix control to 100% when using the effects loop.
Conclusion
I’ve covered how to setup your pedalboard in a logical and organized way. You’ve learned some tips and tricks to getting the most out of your effects, and how to avoid the most common problems.
Once set up, your pedalboard should to give you years of problem-free use.
Please leave any comments or suggestions below! Happy playing!
Check out my complete series of pedal board articles:


Hi Michael,
I have purchased brand new BCB-90x board and wired my pedals to it, including a very old Cry Baby that doesn’t have a 9v cable socket, so I purchased a work around that has the socket and the connection terminals that a 9v battery has.
My problem is that after using the board for 10-15mins, no sound is heard from the speaker for a few mins. It is as if something overheats and needs to cool down, although there is nothing that is unduly heating. My pedals are 1970s Boss HM2 and Flanger, (I.e. originals), Waza Blues Driver, Boss Chromatic Tuner. The Waza and tuner pedals are only 3 months old. The board is 2 months old. There is also a constant warble from the speaker. I have a Fender Mustang GTX100 and my guitar is an SG copy (Antoria).
Any ideas how to stop the sound dropping out please?
Hi again Michael,
Thanks to your excellent advice, today I dismantled my set up and placed the tuner pedal first in line, followed by my very old original Cry Baby and then my other pedals. I discovered that I had inadvertently plugged power into both sockets on the tuner pedal. After rewiring and ensuring power went only to the correct socket on the tuner pedal I am pleased to confirm that everything works beautifully as God intended!
Thanks very much fir your expert advice. Here’s wishing you a prosperous and healthy New Year for 2022.
Hi Adrian,
Glad you solved the issue. Happy Holidays!
Michael
Some great insight and tips. Much appreciated! Cheers.
Thanks for the article. I’m assembling a pedalboard and recommendations on the order of the signal chain is exactly what I needed.